Introduction
The DC Envelope Printer allows you to add logos to your envelope.
Adding A Logo To Your Envelope
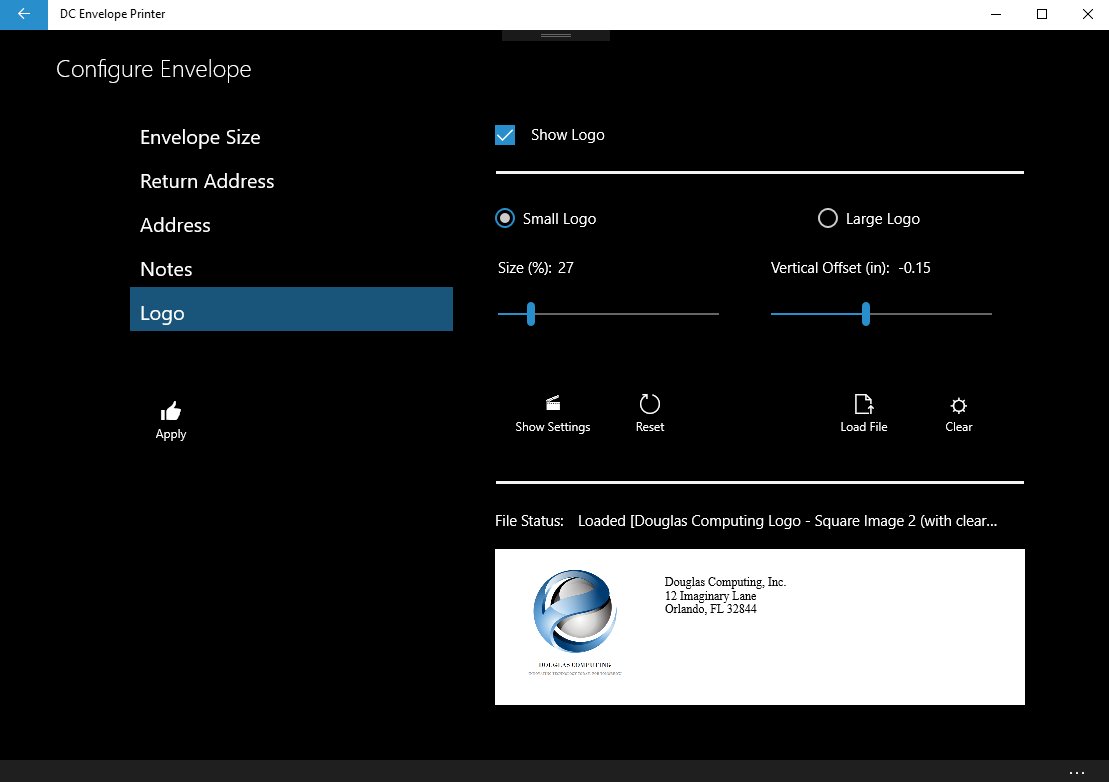
To configure a logo and apply it to your envelope: from the main page of the app, click on the Configure button on the bottom menu bar - which takes you to the Configure Envelope Page. Click on the button labelled Logo on the left of the page. Check Show Logo on the right side of the page, to display controls for configuring your logo. Note: you can configure a small logo and / or a large logo, and select one of them at a time, to be applied to your envelope. Your return address will be displayed to the right of your small logo, however your large logo will occupy the whole return address area, and must contain a return address, if you want one displayed on your envelope.
To configure a small logo, click on the Small Logo radio button control. Next click on the Load File button, to the right and middle of the page, to load your logo. (Please note: your logo file must have a ".png" file extension to be used in this app.) Locate your file using the resulting file dialog page, then select and open it. After your file is loaded, it will probably be too small or large to fit beside your return address. Use the Size slider near the middle of the page, to adjust the size of your logo, so that it will fit neatly on your envelope. (Note: after you make an adjustment, you will need to click on the Show Settings button near the middle of the page, to see how your adjustment will look on your envelope.) After you have adjusted the size of your logo, you may find that it is too high or low on your envelope. Use the Vertical Offset slider, to adjust the vertical position of your logo. Once again, after you have made an adjustment, click on the Show Settings button, to see how your adjustment will look on your envelope.
To configure a large logo, click on the Large Logo radio button control, then essentially follow the immediately above instructions, on how to load and configure a small logo. Remember however, that a large logo will not be displayed with the selected return address, and must include a return address, if you want one displayed on your envelope.
If you would like your small logo to be applied to your envelope, select the Small Logo radio button control, before you apply your configuration settings to your envelope, using the Apply button on the left of the Configure Envelope page. If you would like your large logo to be applied to your envelope, select the Large Logo radio button control, before you apply your configuration settings to your envelope, using the Apply button on the left of the Configure Envelope page.
<< Tutorial Home Page
<< Basic Application Section Home Page
Proudly powered by Weebly
