Introduction
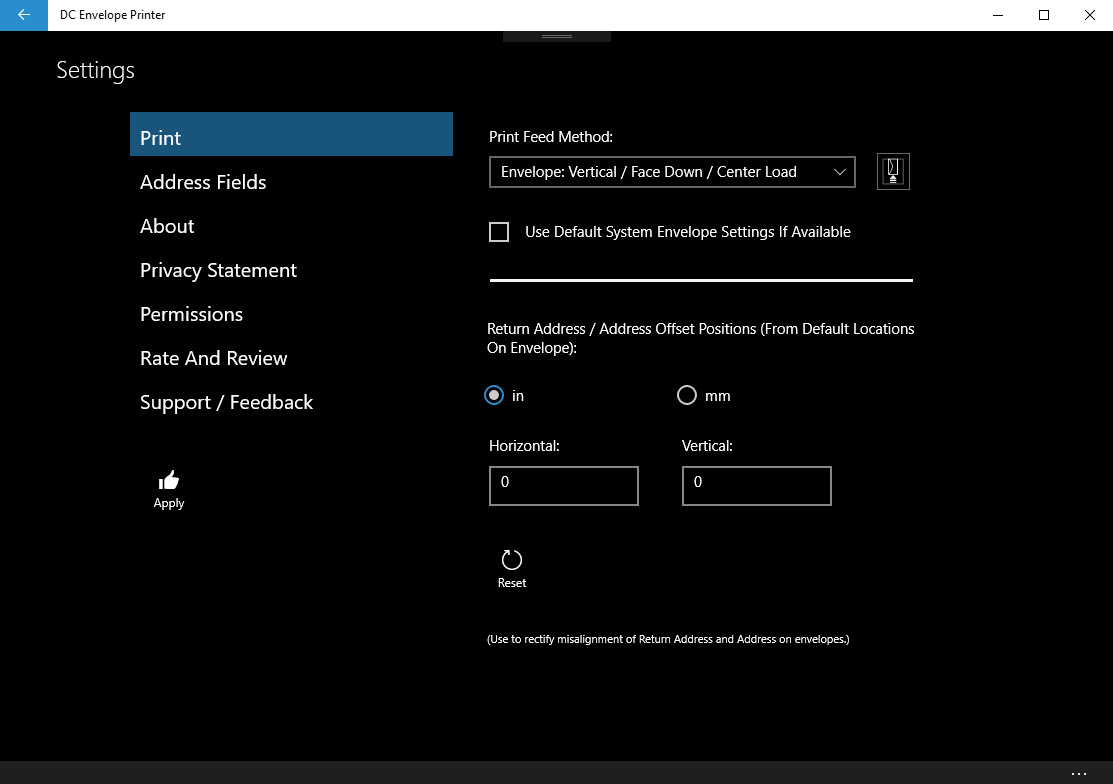
After you have configured your envelope for printing (see here), you may go ahead and print it. Note however, before you start using the DC Envelope Printer, you first need to set the app to the Print Feed method used by your printer. Determine how envelopes are supposed to be fed into your printer, when you print to them. (You can figure out how to do this for example, by consulting your printer manual). Next, from the main page of the DC Envelope Printer, click on the Settings button on the bottom menu bar, then select the print feed method using the Print Feed Method combo box at the top of the Settings page, when the Print button is selected on the left of the page. See 3rd image below.
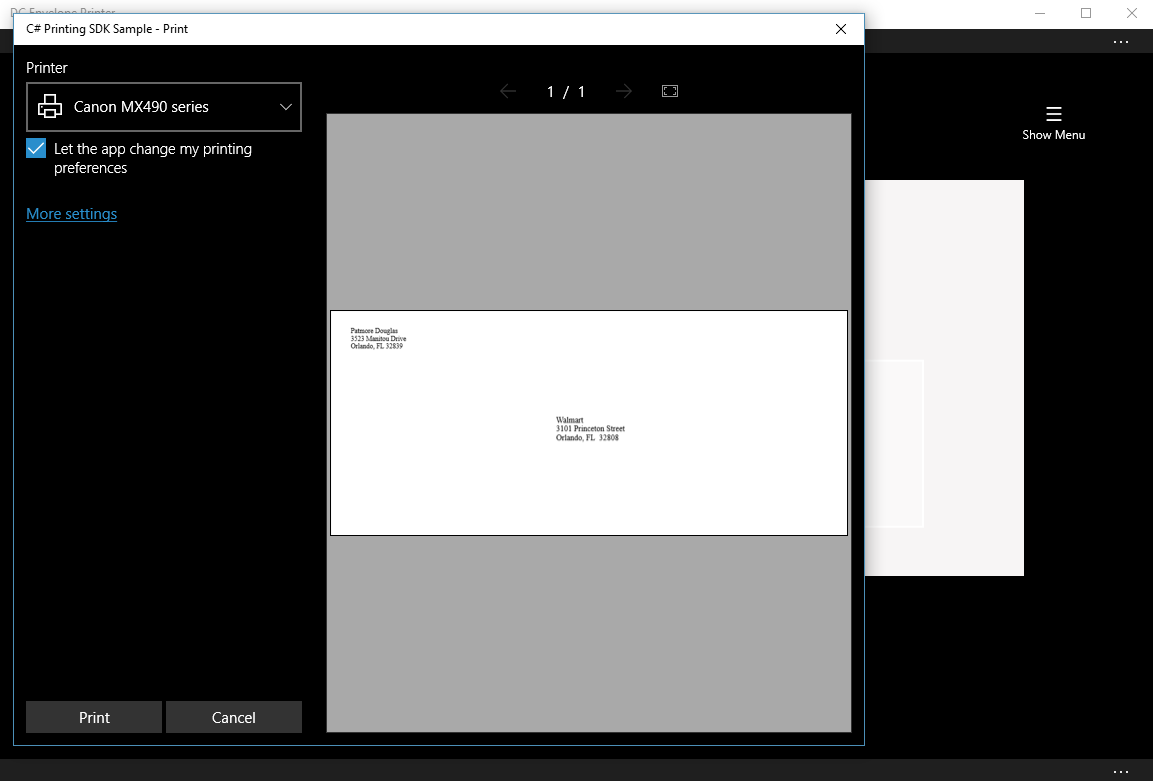
Please note: it is extremely important when you are printing an envelope, to check the Let the app change my printing preferences check box, in the Print Preview screen (seen when you are printing an envelope), to ensure that the DC Envelope Printer prints your envelope predictably. See image below.
Printing Your Envelope
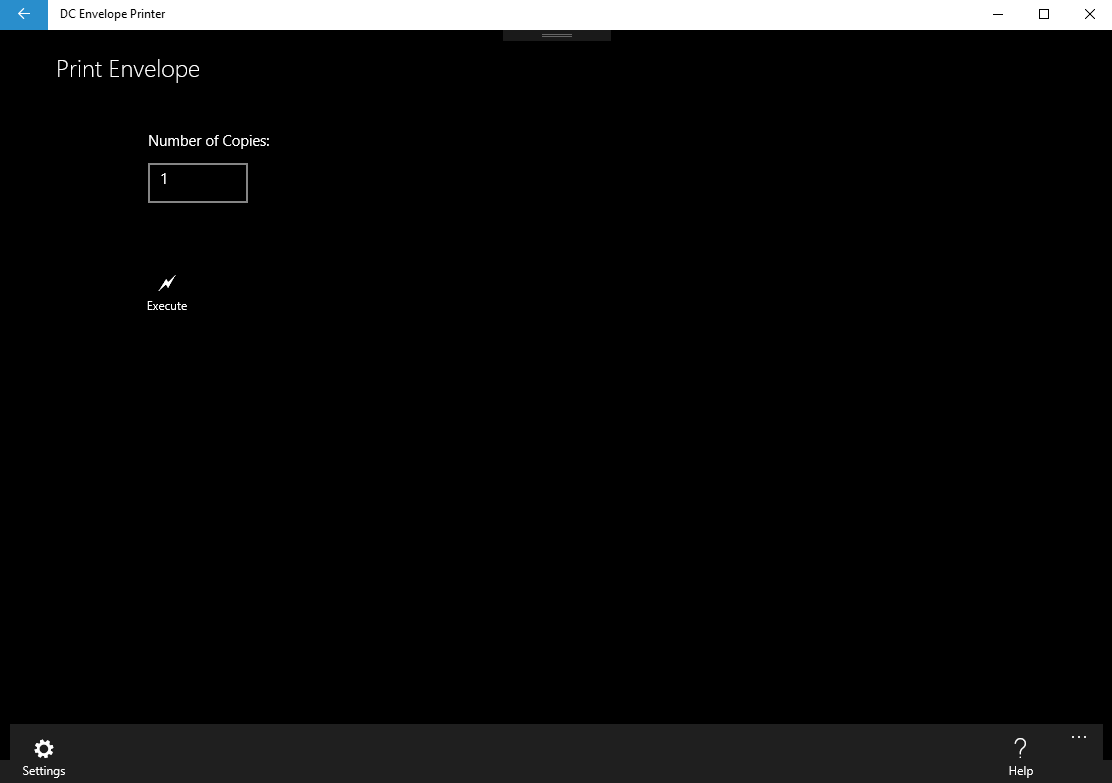
To print your envelope, click on the Print button, on the bottom menu bar for the main page of the app, and use the resulting Print Envelope page (see screenshot above), to optionally specify how many copies of your envelope, you would like printed. Next, click the Execute button on the page, to invoke the Windows Print dialog. Note: you should turn on your printer before you try to print your envelope, so that Windows can verify that one is available, and not return an error. If you get persistent print errors in the DC Envelope Printer app, turn on your printer, then close and reopen the app, so that the app through Windows, can establish a good connection with your printer.
The Use Default System Envelope Settings If Available Option
In version 5.x and higher of the DC Envelope Printer, there is a check box below the Print Feed Method combo box (also exclusive to version 5.x and higher of the DC Envelope Printer), labelled Use Default System Envelope Settings If Available. (See image below.) When this check box is checked, the DC Envelope Printer configures itself to print to specific envelope media sizes like No. 10 or DL. The DC Envelope Printer does not use its generic method, which it uses to print to all envelope sizes supported by this app, when this check box is checked. If you find it difficult to use the DC Envelope printer generally with your printer, you can check this box, and use it to print to envelope sizes No. 10 or DL, fairly reliably.
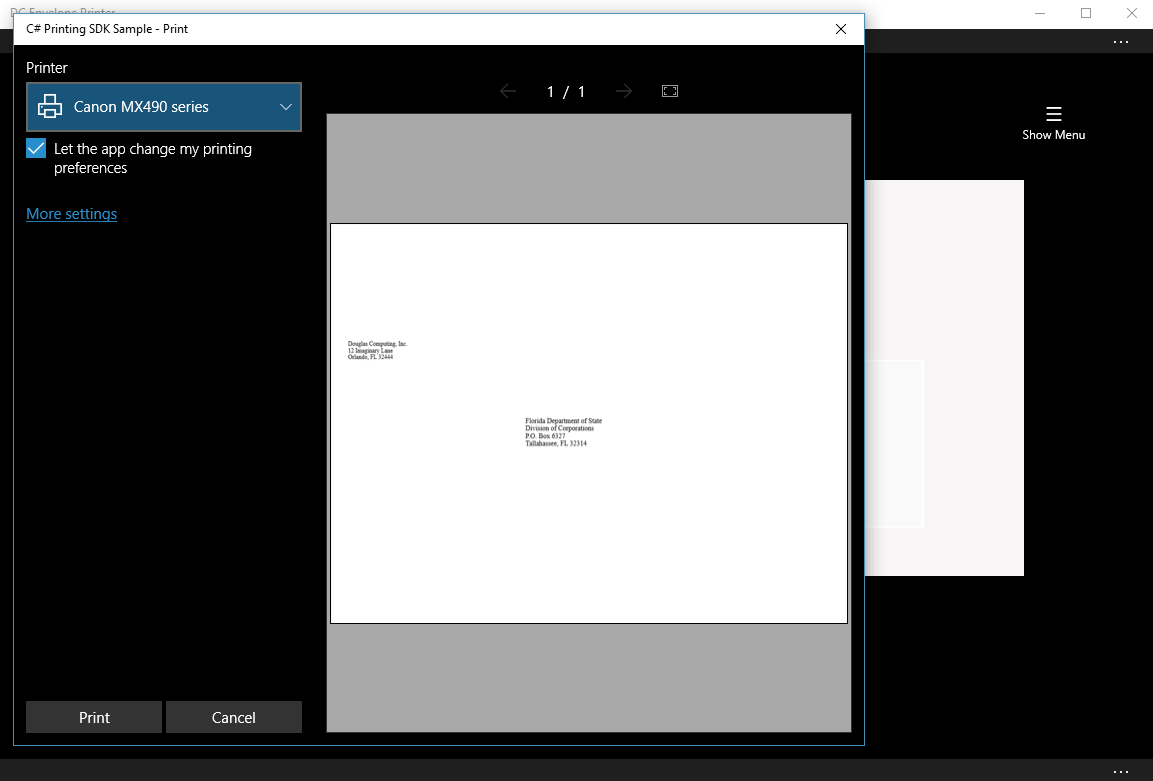
Note: when you check the Use Default System Envelope Settings If Available check box, your envelope should look as shown in the following Print Preview screenshot, seen when you are printing your envelope.
If your envelope does not print out as expected, see the sections Adjusting Print Layout, and Additional Steps To Rectify Printing Problems, below, for instructions on what you may further do, to try and address your issues.
Adjusting Print Layout
The DC Envelope Printer app works fine with most printers, without any need for adjustments, beyond those mentioned above. However, there are some printers where the return address and address outputs are misaligned (i.e. they are not situated properly on envelopes) because of circumstances beyond those discussed above. The DC Envelope Printer app, allows you to compensate for this, by adjusting the horizontal and vertical positions of return addresses / addresses on envelopes. To access this feature, from the main page of the app, click on the Settings button on the bottom menu bar for the page, and click on the Print button, to the left of the resulting page. Use the controls in the bottom section of the resulting page, to compensate for the misalignment. Specifically, use trial and error to derive the best horizontal and/or vertical settings, so that your return addresses / addresses are aligned properly on your envelopes. For example, select 'in' for the unit of measurement, and enter 1 in the 'Horizontal' box, to specify that the return address and address on your envelope, should be printed one inch to the right of their normal/default positions. Then click the Apply button on the page, to apply your settings to the DC Envelope Printer app. Next, print an envelope with the app, and note the new positions of the return address and address on your envelope. If you believe the return address and address should be shifted over to the right some more on your envelope, increase the amount you enter into the 'Horizontal' box, then use the Apply button to apply your changes to the app. Print out an envelope, and note the results one more time. Repeat the above, increasing or decreasing the value you enter into the 'Horizontal' box, and optionally in the 'Vertical' box, until you arrive at a setting where you are happy with the results. Note: use the back arrow at the top left of the page, if you would like to back out of the page, without applying any changes you may have made to your settings, when you are finished.
Additional Steps To Rectify Printing Problems
If the above suggestions on how to deal with your printing issues do not rectify your printing problems, try going to the web site of your printer manufacturer, and downloading the latest Windows 8 / 10 drivers for your printer. This often clears up issues like being unable to print to envelopes of certain sizes. E.g. if you are not able to print to envelopes of certain sizes, but can print to No. 10 (4.12 in x 9.50 in) envelopes, update your Windows 8 / 10 drivers for your printer, to try and resolve your problem.
<< Tutorial Home Page
<< Basic Application Section Home Page
Proudly powered by Weebly
