Introduction
The DC Envelope Printer allows you to create mailing lists from addressee address records. These mailing lists can optionally be saved to files, and later reopened. Mailing lists can be applied one at a time, to envelopes in the bulk mail main page of the app, and then printed.
Note: to access the Addresses page, whose features are discussed here, from the bulk mail main page, click on the Configure button in the bottom menu of the page, then click on the Addresses button on the left of the resulting page. Please note that there must be address records in the app's database, to use this feature. See here, on how you may add address records to the app's database.
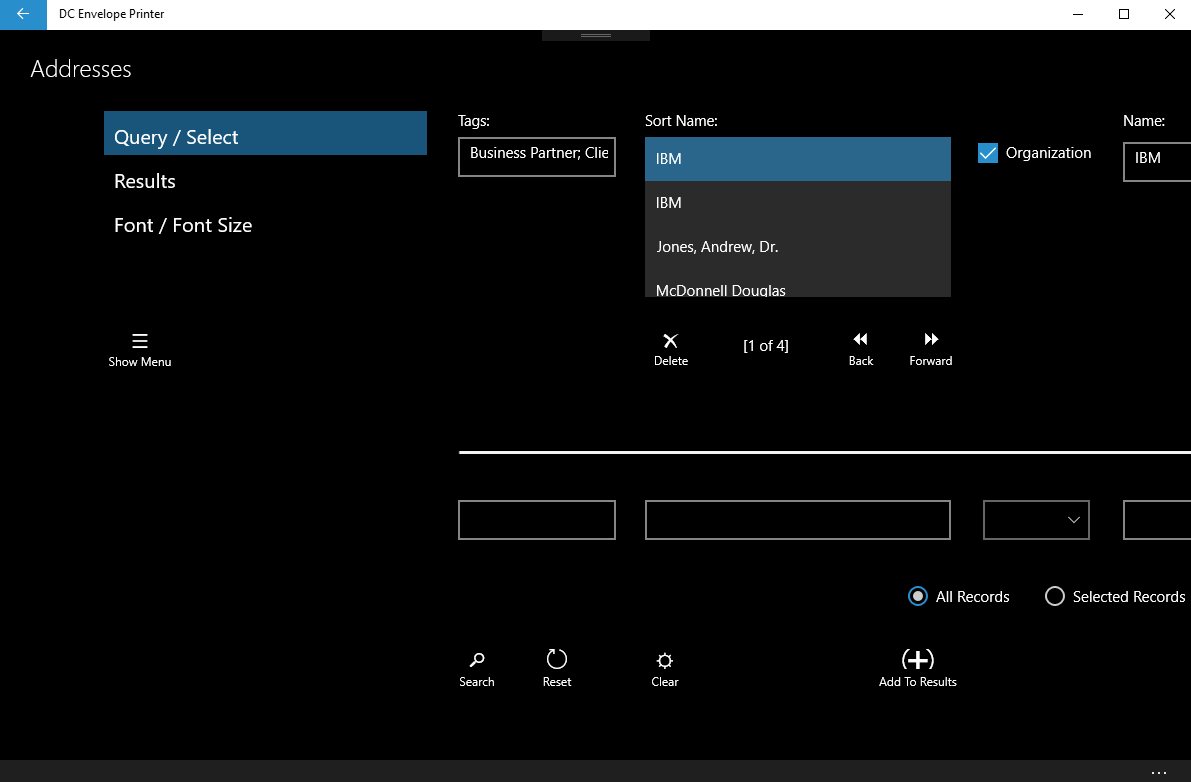
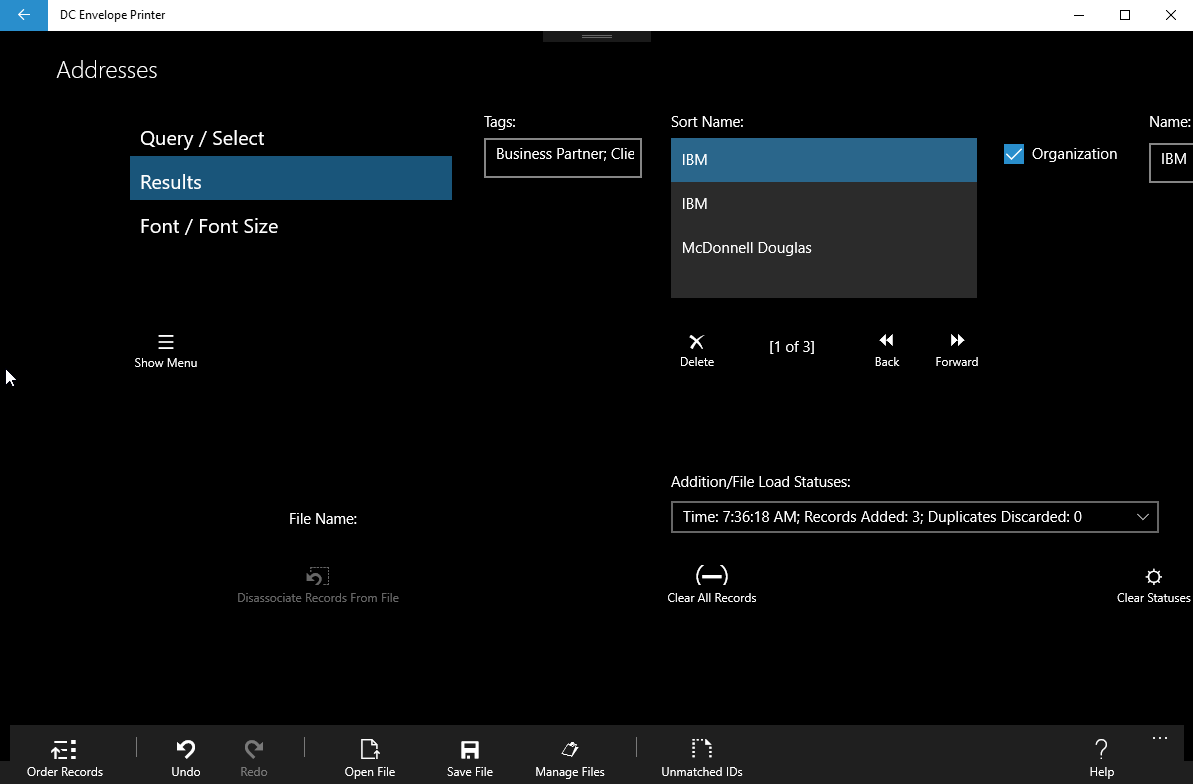
You create a mailing list by adding and / or deleting records from the Results section of the Addresses page. First, click on the Results button on the left of the Addresses page, to go to the Results section. If you want to create a mailing list from scratch, you may click on the "Clear All Records" button near the center of the page, to clear the page of all records. Next, click on the Query / Select button, to begin the process of adding address records to your mailing list. Say for example, a number of your address records have the tag "Client" in them, and you would like to create a mailing list of clients. Type "client" into the text box directly below the Tags text box at the top of the page. Next click on the "Search" button below the text box you just entered the value. The above action returns all address records that contain "client" in their Tags field. (Please note: searches are not case sensitive.) Your search for example might return a record which contains "Client" in the Tags field, another one which contains "Business Partner; Client" in the Tags Field, and another one which contains "Favorite Client" in the Tags field. After doing a search, you may add the results to the Results section of the page. To do so, you may ensure that the "All Records" radio button above the "Add To Results" button is selected, then click on the "Add To Results" button. Next, click on the Results button on the left of the page, to go to the Results section of the Addresses page. There you should see the records you just added, along with a log of your action, in the "Addition/File Load Statuses" combo box. If you would like to apply the addresses in the Results section of the Addresses page to your envelopes, simply click on the back arrow at the top left of the page to exit onto the Configure Envelopes page. Then click on the Apply button on the left of the Configure Envelopes page, to apply your addresses, as well as other configuration settings, to your envelopes, on the bulk mail main page of the app.
Using Query / Select
In the Query / Select section of the Addresses page, you may search not only the Tags field of addressee address records, but any combination of fields. For example, if you want to create a mailing list of all clients who live in California, you can type "client" in the Tags field search box (directly under the Tags field on the page), as well as "CA" in the Address field search box - if you are using single multiline address text boxes (vs. standard address fields text boxes). You can do more complicated searches like first doing a search for "client" in the Tags field of addressee address records, then doing a search for "Business Partner" in the Tags field of the resulting set of records. The above two step search gives you clients who are also business partners.
After you have completed a search, you can click on the Reset button, to restore the full set of address records available in the database. You can click on the Clear button, to clear away values present in all the search text boxes. You can do a search, then delete some of the records in the search results, before adding them to the Results section of the Addresses page. The Query / Select section therefore gives you a lot of flexibility, in how you can compose a mailing list.
Another important feature of the Addresses page, is its automatic deduplication of records that are added to the Results section of the page. This means you can continually add different search results to the Results section, and not have to worry about having duplicate address records in your mailing lists.
The Query / Select section also allows you to add all the results of a search / record selection at once, or add only the records you selected - by using the "All Records" or "Selected Records" radio button, in conjunction with the "Add To Results" button.
Managing Records in the Results Section
The records in the Results section of the Addresses page, make up your mailing list. As records are added and deleted from the section, the DC Envelope Printer keeps track, and allows you to undo and redo the changes, using the Undo and Redo buttons on the bottom menu bar for the page. Another important feature of the Results section, is that the DC Envelope printer automatically remembers records as they are added and deleted, so that when you exit the app and return to the Results section of the Addresses page, the records will still be there.
The DC Envelope Printer also allows you to save records in the Results section, to a file. To do this, simply click on the "Save As" button on the bottom menu bar for the page, and use the resulting page dialog to save your file. You can open a saved file, using the "Open File" button on the bottom menu bar for the page, and use the resulting page dialog to open your file. You can manage files by renaming or deleting them, using the "Manage Files" feature. Simply click on the "Manage Files" button on the bottom menu bar for the page, and use the resulting page dialog to manage your files.
After you have composed your mailing list, you may use the "Order Records" button on the bottom menu bar for the page, to sort your records. This makes it easier to manage envelopes in your mailing list, which have been applied to the bulk mail main page.
Disassociating Records From A File
When you save or open a file, then modify it, the DC Envelope Printer indicates that the file has been changed, by displaying an icon of a pen writing on a notepad, on the left of the "Disassociate Records From File" button, in the Results section of the Addresses page. If you exit the Addresses page while the icon is displayed, or you click on the "Disassociate Records From File" button at any time while a file is opened, the records in the Results page will become disassociated from your file, and whatever modifications you made to records in the file, will not be recorded by the file. The records however will be automatically be tracked by the DC Envelope Printer, in a default file. This will result in you seeing the records if you exit the Addresses page into the Configure Envelopes page, and subsequently exit the app, then reopen the app, and go back to the Results section of the Addresses page.
Unmatched IDs
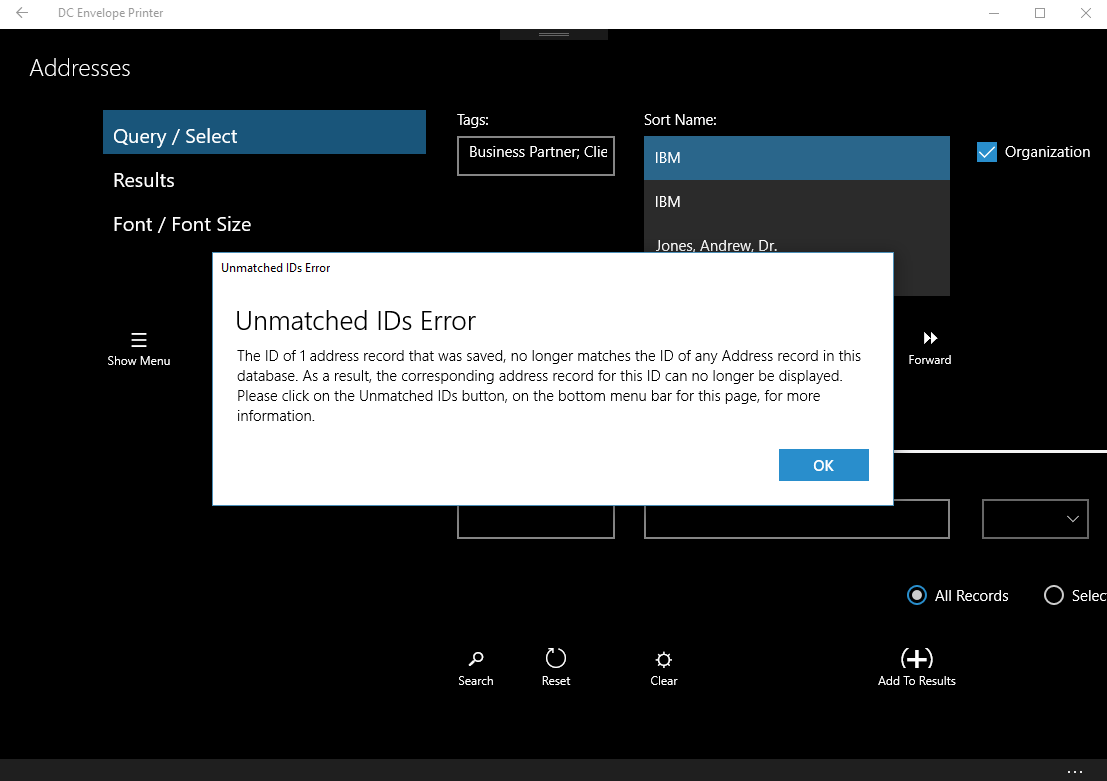
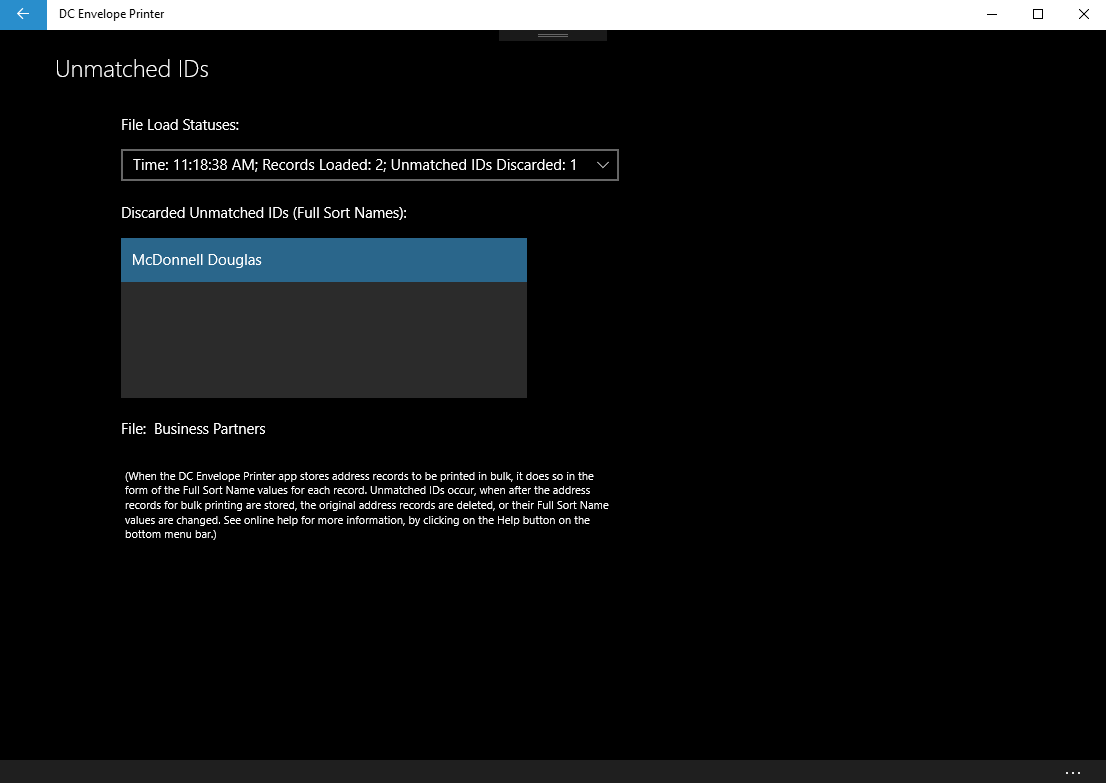
The DC Envelope Printer stores mailing lists, in the form of unique identifiers (Full Sort Names) for each address record. This saves on space, and allows mailing lists to have the freshest versions of address records. For example, if after you saved an address record as part of a mailing list, you modified the street address in the record, whenever you open the mailing list and apply it to the envelopes in the bulk mail main page, the record will contain the modification you made to the street address. Situations may arise however, where the Full Sort Name of a record is changed, or the record is deleted in the app's database. When this occurs, you will get an Unmatched ID error for the record that is stored as part of your mailing list. It is recommended that if you see an "Unmatched ID" error message, you click on the "Unmatched ID" button on the bottom menu bar for the Addresses page - while in the Results section - and look through the data, and try and resolve the issues.
Using the data in the following screenshot as an example, if the following was your data, you would look to see if a record for McDonnell Douglas was either deleted from your database, or the data in the record was modified, so that it now has a new Full Sort Name. If the record was deleted, then the record and its deletion from the database could be ignored, since its corresponding record in the mailing list was also deleted, automatically, by the DC Envelope Printer, reflecting the fact that your company no longer communicates with the addressee. If the record was not deleted, but was modified, you would optionally add the modified address record to your mailing list, and then save the mailing list with the updated data. If there were other items (IDs) in the list box, you would repeat the above steps for the other items.
Note: unless you are constantly modifying your addressee address records, in ways that specifically affect their Full Sort Names, you should seldom see this error. And even when you see the error, it is a lot less work addressing the issues pointed out by the error, than it is recomposing your mailing lists from scratch.
Font / Font Size
Click on the Font / Font Size button on the left of the Addresses page, to select the font and font size you would like the addresses on your envelopes to have.
<< Tutorial Home Page
<< Bulk Mail Section Home Page
Proudly powered by Weebly


