
Introduction
Before you print out an envelope, you must first configure it by setting the envelope size, the addressor, the addressee, along with other information. Below are alternate sets of instructions, on how you may go about doing so.
Steps On Configuring An Envelope
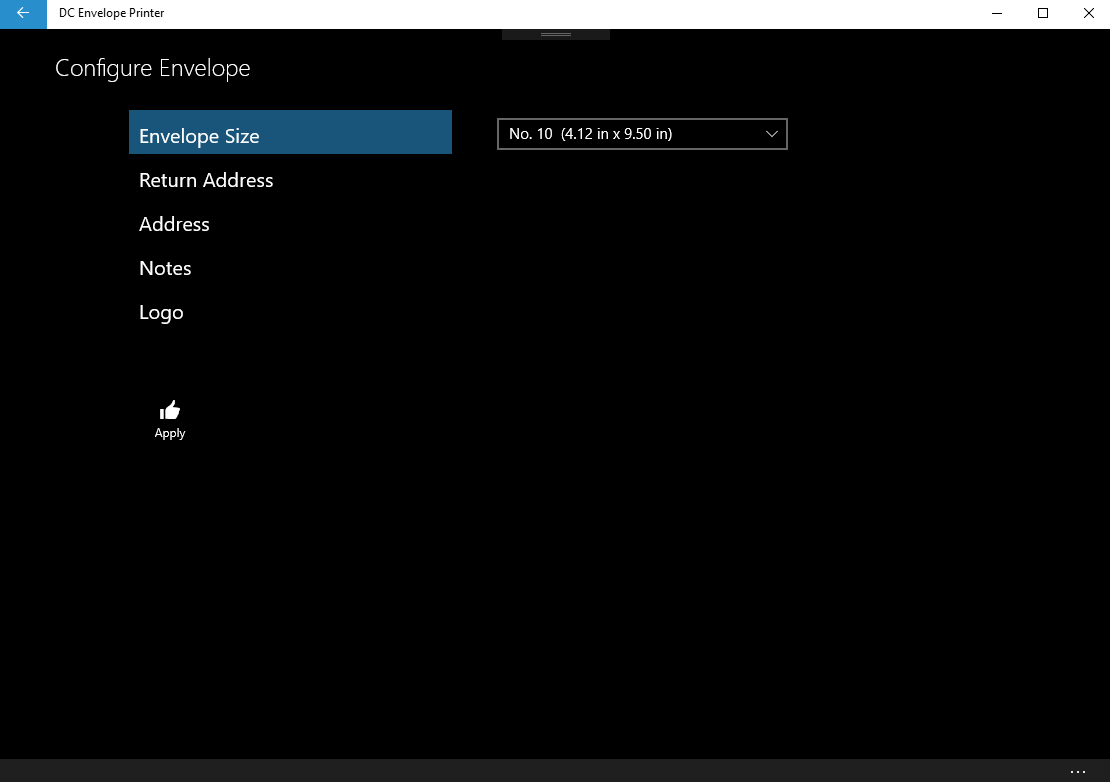
i) If you have NOT entered addresser and addressee information into the app's database, and you want a simple, straightforward experience using the DC Envelope Printer, simply configure your envelope by selecting the size you want. To do so, access the bottom menu bar on the Main page of the app, and click on the Configure button. Click on the Envelope Size button to the left on the resultant app page (see screenshot above), and then select the envelope size you want. Click on the Apply button to apply your selection to the envelope image on the main page.
Please note, if you have NOT entered addresser and addressee information into the app's database, you cannot change the font or font size settings for your return address and address. Entering addresser and addressee records into the app's database, unlocks this feature.
ii) If you have entered addresser and/or addressee information into the app's database, and you want to configure your envelope in a more sophisticated way, click on the Configure button on the bottom menu bar for the main page, to enter the Configure Envelope page (see screenshot above). To the left of the Configure Envelope page, is a list of buttons - Envelope Size, Return Address, Address, Notes and Logo - that you can click on, to configure the different aspects of your envelope. Click on the Envelope Size button to select the size of the envelope you want. Click on the Return Address button, to select the return address record in the app's database, you would like printed on the envelope. Note: you can also select the font and font size you would like for the return address. Similarly, click on the Address button, to select the address record in the app's database, you would like printed on the envelope. Note also: you can also select the font and font size you would like for the address. Click on the Notes button, and check whether you would like to have a horizontal note displayed in the middle of your envelope, and / or check whether would like a note displayed to the left of your address. As for your return address and address, you can select the font and font sizes that are used in each of your notes. Finally, click on the Logo button, and check whether you would like a logo, which you loaded into the DC Envelope Printer app, to be added to your envelope. (See here for more information on how you can load and configure logos for placement on your envelope.)
If you are happy with your selections, click on the Apply button, on the left of the page, to apply your selections to your envelope. If you do not want to apply your selections, click on the large back arrow, at the top left of the page, to back out of applying your selections to your envelope.
Please note: the Notes and Logo features are in-app purchase features. This means they are free to use for a trial period of 7 days, but afterwards, will have to be purchased, in order to be used permanently.
<< Tutorial Home Page
<< Basic Application Section Home Page
Before you print out an envelope, you must first configure it by setting the envelope size, the addressor, the addressee, along with other information. Below are alternate sets of instructions, on how you may go about doing so.
Steps On Configuring An Envelope
i) If you have NOT entered addresser and addressee information into the app's database, and you want a simple, straightforward experience using the DC Envelope Printer, simply configure your envelope by selecting the size you want. To do so, access the bottom menu bar on the Main page of the app, and click on the Configure button. Click on the Envelope Size button to the left on the resultant app page (see screenshot above), and then select the envelope size you want. Click on the Apply button to apply your selection to the envelope image on the main page.
Please note, if you have NOT entered addresser and addressee information into the app's database, you cannot change the font or font size settings for your return address and address. Entering addresser and addressee records into the app's database, unlocks this feature.
ii) If you have entered addresser and/or addressee information into the app's database, and you want to configure your envelope in a more sophisticated way, click on the Configure button on the bottom menu bar for the main page, to enter the Configure Envelope page (see screenshot above). To the left of the Configure Envelope page, is a list of buttons - Envelope Size, Return Address, Address, Notes and Logo - that you can click on, to configure the different aspects of your envelope. Click on the Envelope Size button to select the size of the envelope you want. Click on the Return Address button, to select the return address record in the app's database, you would like printed on the envelope. Note: you can also select the font and font size you would like for the return address. Similarly, click on the Address button, to select the address record in the app's database, you would like printed on the envelope. Note also: you can also select the font and font size you would like for the address. Click on the Notes button, and check whether you would like to have a horizontal note displayed in the middle of your envelope, and / or check whether would like a note displayed to the left of your address. As for your return address and address, you can select the font and font sizes that are used in each of your notes. Finally, click on the Logo button, and check whether you would like a logo, which you loaded into the DC Envelope Printer app, to be added to your envelope. (See here for more information on how you can load and configure logos for placement on your envelope.)
If you are happy with your selections, click on the Apply button, on the left of the page, to apply your selections to your envelope. If you do not want to apply your selections, click on the large back arrow, at the top left of the page, to back out of applying your selections to your envelope.
Please note: the Notes and Logo features are in-app purchase features. This means they are free to use for a trial period of 7 days, but afterwards, will have to be purchased, in order to be used permanently.
<< Tutorial Home Page
<< Basic Application Section Home Page